Tuesday, June 12, 2012

Instrumentalist Theory Lesson Plan


Written By: Allison Swenson and Elisa Johnson
Grade:2
Time needed:45 min.
Objective:Students will understand how art can be a tool for teaching by seeing instrumentalist art samples, analyzing the lessons taught in some books that use art, and creating their own work of art that will convey a lesson using found objects.

State Standards:
  • Mathematics: Students will acquire number sense with whole numbers and fractions and perform operations with whole numbers.
  • Language Arts: Develop and use skills to communicate ideas, information, and feelings.

National Standards:
  • Fine Arts: Making connections between art and other disciplines.
  • Fine Arts: Students identify connections between the visual arts and other disciplines in the curriculum.
  • Language Arts: Students present information, concepts, and ideas to an audience of listeners or readers on a variety of topics.
Materials needed:
  • PowerPoint or other method to display pictures
  • Caldecott award winner books
  • Paper
  • Glue
  • Found objects (some from outside, or from sample box, in backpacks…)

 1) Explain/Discuss Instrumentalist Theory
Art is used to teach lessons, morals, or about historical events and injustices
QUESTION: How do you think art can teach? Can you think of some examples?

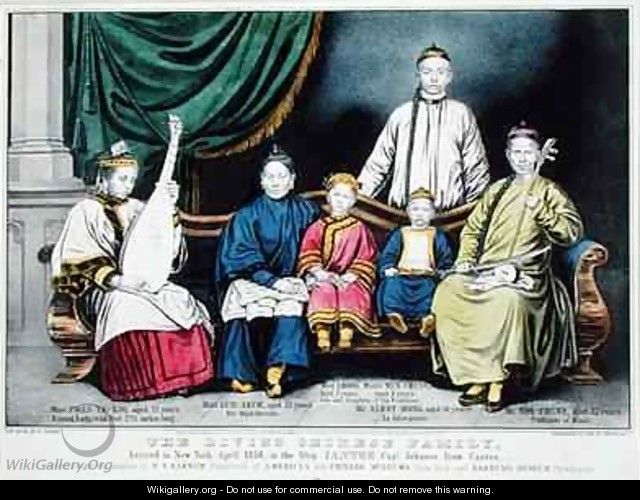
2) Show Examples of Instrumentalist Art
(Eugene Delacroix, Francisco Goya, Norman Rockwell, Frank Lloyd Wright etc.)
Note: Check with your school’s administrators and parents to see if some of these images would be allowed to be displayed.


Algerian Women in Their Apartments, by Eugene Delacroix. One of the messages of this painting can be  colonialism and slavery. Algeria was occupied by France in the 1830s.


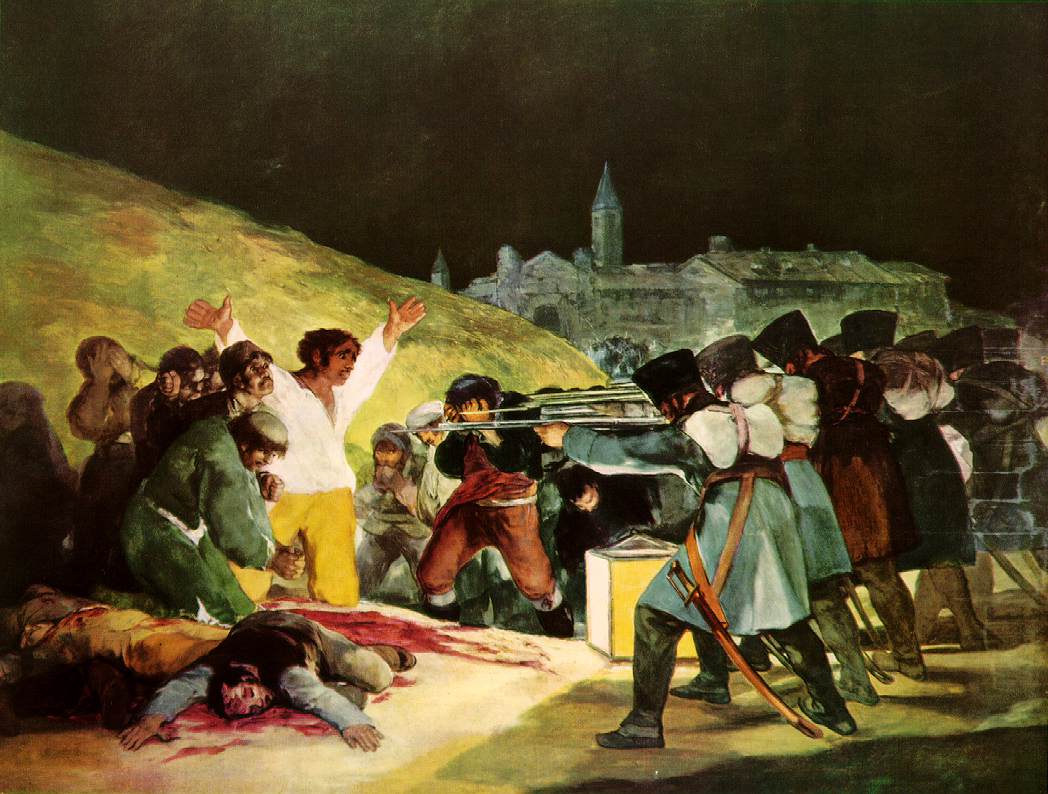
The Shootings of May 3, 1808 by Francisco Goya. This painting represents the events that took place in Spain in 1808 when Napoleon sent his troops to Spain with the pretense to help conquer Portugal. His objective was the throne of Spain, and Spaniards revolted. In the picture, French soldiers retaliate, but by 1814, the French had been thrown out of Spain.


The Problem We All Live With, by Norman Rockwell. The story of Ruby Bridges and the court-ordered mandate to have integration in schools on Nov. 14, 1960.


Peter Pumpkin Eater, by Maxfield Parrish. Learning Mother Goose rhymes.


3) Activity with Caldecott books
  • Introduction: The Caldecott Medal was named in honor of nineteenth-century English illustrator Randolph Caldecott. It is awarded annually by the Association for Library Service to Children, a division of the American Library Association, to the artist of the most distinguished American picture book for children.

  • Activity: Students will work in small group and each will be given a Caldecott medal book. These books use beautiful art and teach lessons. Students are asked to read the books and then share with the class what they think the lessons in them are. They don’t all have to be academic lessons. Students may find teachings about imagination, creativity, self-concept…

Caldecott books used for this activity:
  • Jumanji, by Chris Van Allsburg
  • Where the Wild Things Are, by Maurice Sendak
  • Abraham Lincoln, by Ingri d’Aulaire and Edgar Parin
  • Rapunzel, by Paul Zelinsky
  • The Lion and the Mouse by Jerry Pinkney
  • Snowflake Bentley, illustrated by Mary Azarian; text by Karen Ackerman.
  • Fables, by Arnold Lobel
  • Why Mosquitos Buz in People’s Ears: a West African Tale, illustrated by Leo and Diane Dillon; text by Varna Aardema.

4) Read Aloud and Highlight The Selfish Giant, by Oscar Wilde

  • Discuss with the Students how the pictures contribute to the overall message of the story
  • What kind of lessons, messages, or historical truths are taught through the pictures?
  • How could we teach these lessons in a different way?
5) Introduction to Found Object Art

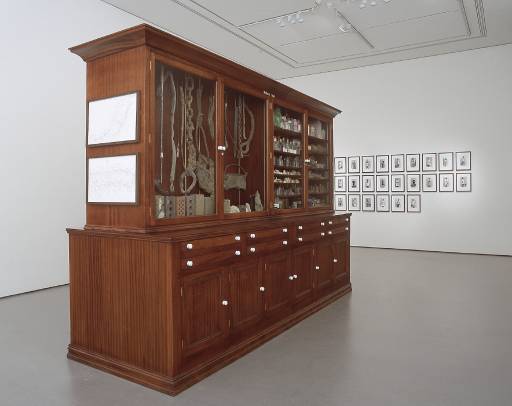
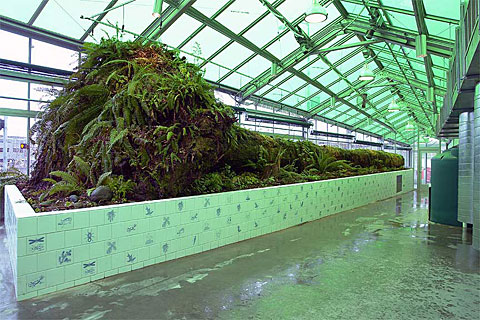
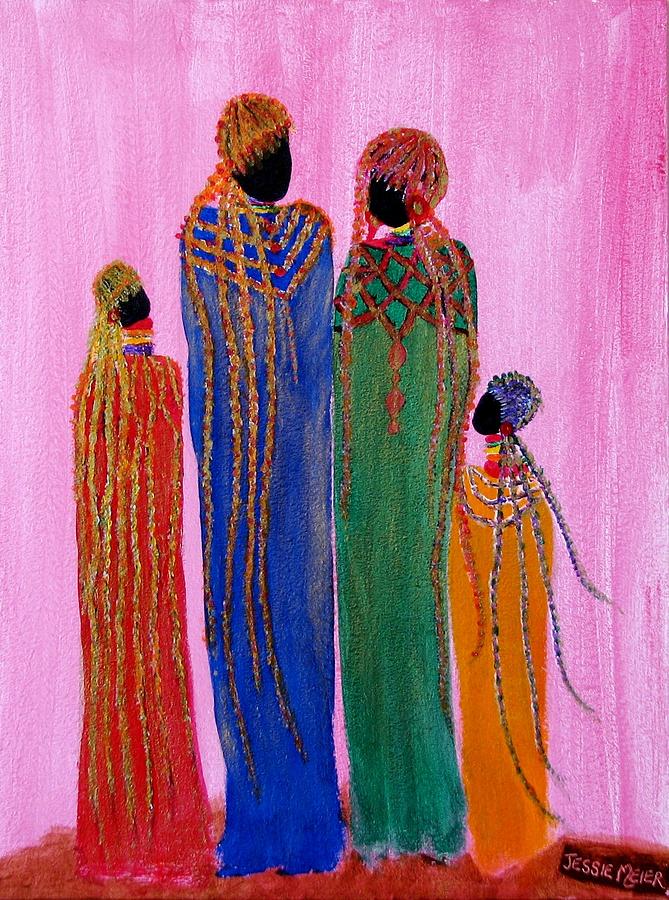
  • Introduce El Anatsui
  • Show pictures in the story Raaalph!
  • Explain the concepts in 12 Ways to Get to 11
  • Watch video clips of the Artist. http://www.pbs.org/art21/artists/el-anatsui
  • How do the found objects help teach the lesson in El Anatsui’s art?
  • What lesson is El Anatsui trying to teach?
  • Does the process of hiring college students and reusing bottle caps influence the message that is conveyed?

6) Show a prototype of Found Object Art
  • Teach and exemplify the process
  1. Select 11 objects using a combination of at least three different objects. These will be the media. Discuss why certain objects were used. Fill out the worksheet (seen below) as you select your items.
  2. Select a ground. Any paper or surface can work. Discuss what messages can be sent by using different grounds.
  3. Find support to use while making the artwork and for displaying it. Any support will work. Choose one that helps teach the lesson you want to convey.
  4.  Arrange the objects to teach a lesson from The Selfish Giant.
  5. Find a way to display the artwork.
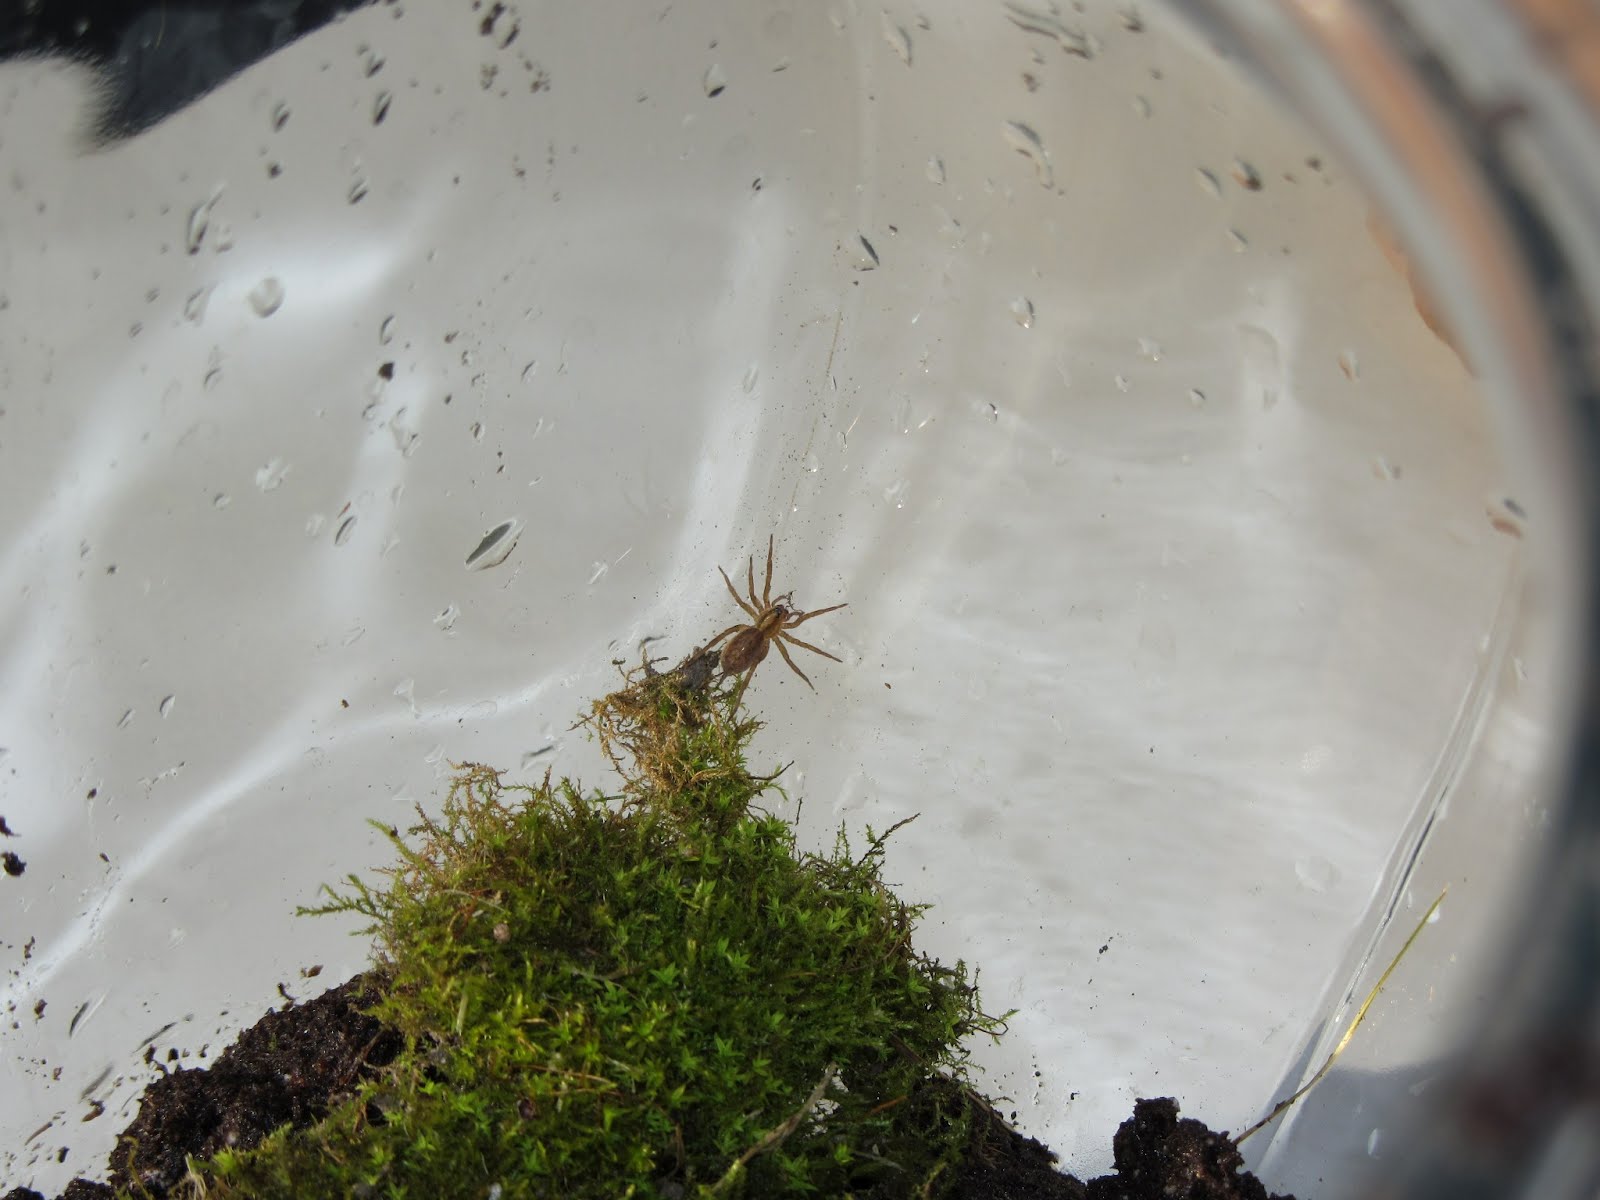
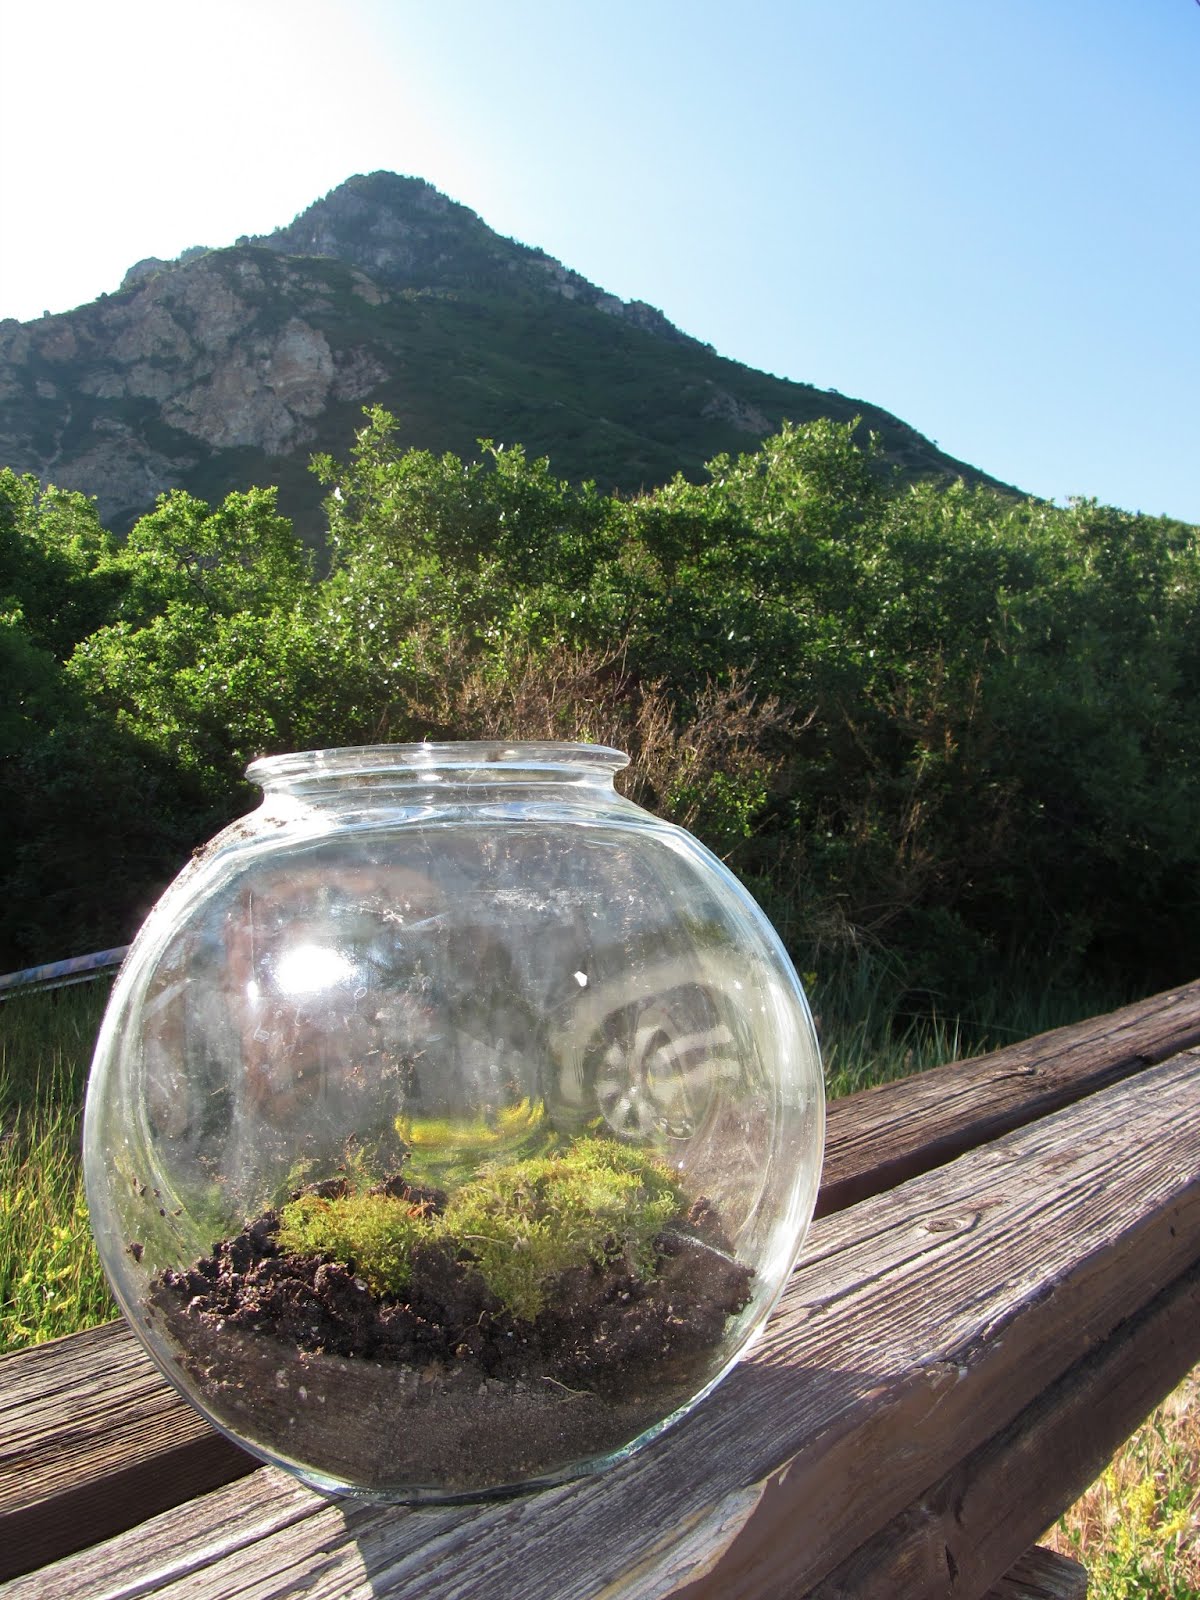
  • My Prototype
  1. To select my objects, I decided to use all natural items found outside to further the feel of a “garden” and to convey feelings of life and growth. I chose: 1 Pinecone, 1 Burr, 1 Stick, 4 long strands of grass, 4 Maple “Helicopters.” 11 items in all.

  1.  For my ground, I chose a blank sheet of white paper to keep it simple and childlike. 
  2.  For my support, I used a table to help me arrange the objects, and as part of the process I didn't glue the objects on, but photographed them and displayed the picture digitally through a PowerPoint Projection.
  3. Next, I explained why I chose the objects and arranged them as I did.


6) Handout the worksheet and take the students on a walk to collect their objects. Allow them to assemble, glue, photograph, etc. in class. Use The Selfish Giant as a springboard for the message of their artwork.
  • How could you use found objects to tell a story or teach a lesson from The Selfish Giant. For a second grader, you could be more specific and ask, “If you were to play in the Giant’s garden, what kinds of things would you do? What would it look like?”
  • You have to use at least 3 different kinds of found objects
  • All the objects have to equal a total of 11.
  • Any combination of at least three kinds of objects is possible, as long as the result is still 11.


Name: _____
 12 Ways to Make 11
Object
How many?
Why did you choose this object? / What will you make with it?


Total Count:
Does it equal 11?


______


7) Assessment
  • Each student will write a paragraph about what their picture is about and share it with the class. They will also show the handout they used in collecting the 11 objects and explain why they chose those particular objects as media.
  • Questions to consider when assessing students' work
    • Is there a lesson conveyed in their picture and written paragraph?
    • What aspect of the book "The Selfish Giant" inspire you to create your work?
    • Are there any other lessons you could have highlighted?
    • Do you think you learn better when asked to convey meaning through art?
    • Was this an enjoyable experience for you?

8) Photography adaption
  • Let the students create their found object art and photograph it. Give them five minutes to change the scene and take another photograph. Do this several times and allow the students to use their scenes to write their own story. These could be bound into books and show to parents.

Mimetic Theory Lesson Plan

Written By: Whitney Gasser and Charilee Barrett
Grade Level: 4th Grade
Time needed: Two 45 minute sessions

Objective: Students will understand the mimetic theory and demonstrate an understanding of the essence of their current environment and how it existed in the past through creating a classroom vivarium.

National Visual Arts Standard
3. Content Standard: Choosing and evaluating a range of subject matter, symbols, and ideas
Achievement Standard: Students explore and understand prospective content for works of art
select and use subject matter, symbols, and ideas to communicate meaning

State Visual Arts Standard
Utah State Standard: Visual Art
Standard 1 (Making): The student will explore and refine the application of media, techniques, and artistic processes.
Objective 1  Explore a variety of art materials while learning new techniques and processes.
Standard 3 (Expressing): The student will choose and evaluate artistic subject matter, themes, symbols, ideas, meanings, and purposes.
Objective 1 Explore possible content in art prints or works of art.

  1. Determine and explore a variety of sources of inspiration for making art; e.g., panoramic view, microcosm, people, imagination, experimentation, decoration, celebration, events, interpretation of emotions, education, religion.

Utah State Standard: Science
Standard 5 Students will understand the physical characteristics of Utah's wetlands, forests, and deserts and identify common organisms for each environment.
Objective 2 Describe the common plants and animals found in Utah environments and how these organisms have adapted to the environment in which they live.

a. Describe some of the interactions between animals and plants of a given environment (e.g., woodpecker eats insects that live on trees of a forest, brine shrimp of the Great Salt Lake eat algae and birds feed on brine shrimp).


Materials needed:
-glass fishbowl
-dirt
-rocks
-plants
-insects and other local critters
-shovel

1. Explain mimetic theory where art is essentially an imitation of nature. Discuss the difference between Realism and Mimetic theory.

2. Discuss different popular mimetic artists who are able to capture the essence of nature.

a) Introduce Nikki Lee and her process. She first approaches a culture, observes and then tries to become a member of the culture from what she has observed. Explain that her art is a process as she lives with those people for a couple of months and then culminates her project with a picture once she feels like she fits into that reality.

Hispanic Project


Geriatric Project


Yuppie Project

b) Questions to promote classroom discussion:
-Is this real art?
-Can you understand the essence of a community or culture with only a couple of months exposure?
-How does this relate to the mimetic theory?

c) Discuss the second Artist, Walton Ford, and his style.

Watch Walton Ford Art 21 Video
00:19-00:51
03:33-05:34

<p style="font-size:11px; font-family:Arial, Helvetica, sans-serif; color: #808080; margin-top: 5px; background: transparent; text-align: center; width: 512px;">Watch <a style="text-decoration:none !important; font-weight:normal !important; height: 13px; color:#4eb2fe !important;" href="http://video.pbs.org/video/1239552786" target="_blank">Humor</a> on PBS. See more from <a style="text-decoration:none !important; font-weight:normal !important; height: 13px; color:#4eb2fe !important;" href="http://www.pbs.org/art21/" target="_blank">ART:21.</a></p>

Explain that he brings out the dark side of reality in contrast to Audubon's (19th c. artist and naturalist in America) work. Walton Ford tries to recreate these pictures in the same way that Audubon would have, while incorporating  a dark twist of reality.


3. Talk about the Passenger Pigeon and how it impacted those who lived in its time period and how it became extinct. Read: Grandmother’s Pigeon by Louise Erdrich and discuss how things have changed since the peak of the Passenger Pigeon population.  Ask students what would have happened if people wouldn’t have hunted them? Make a direct connection with your students to how this applies to the mimetic theory. The Passenger Pigeon painting conveys the essence of a past reality.

4.
a)  Introduce the class to the work ofMark Dion with Art 21 video clip 00:14-1:43. Talk about his installment pieces and how they teach you of a past reality, they capture what that past reality was like and what made up that past reality.

<p style="font-size:11px; font-family:Arial, Helvetica, sans-serif; color: #808080; margin-top: 5px; background: transparent; text-align: center; width: 512px;">Watch <a style="text-decoration:none !important; font-weight:normal !important; height: 13px; color:#4eb2fe !important;" href="http://video.pbs.org/video/1239798902" target="_blank">Ecology</a> on PBS. See more from <a style="text-decoration:none !important; font-weight:normal !important; height: 13px; color:#4eb2fe !important;" href="http://www.pbs.org/art21/" target="_blank">ART:21.</a></p>


b) Explain to the class that a vivarium is a “place, especially an indoor enclosure, for keeping and raising living animals and plants under natural conditions for observation or research” (freedictionary.com).

c) Watch ***Mark Dion Art 21 Clip 04:22-13:00

d) Discuss how this artist is “holding up the mirror to the present”. The vivarium isn’t a representation of a tree stump, it is a tree stump. As a class discuss the process that makes this piece so meaningful. Discuss the time, lighting, specialists, water systems, irrigation systems, cooling systems, panels to control the light levels, tinted glass to replicate the color spectrum from original canopy. Discuss the statement “we really have tried to highlight that difficulty of replicating what nature can do.”

5. Discuss with students the essence of their environment at home and at school. For homework have students talk with their parents about what was there before their house was built. Have students draw or tape on different plants and species that they think would have existed in the environment that predated their house.

DAY 2

6. Discuss what students found out about their living environment around their home. Have students do a pair share to compare the similarities and differences of what they found.

7. Assess the class’s understanding of the mimetic theory and vivariums by creating a classroom Vivarium based off of Mark Dion’s vivarium.

a) Start by finding a support for the ground and medium. A fishbowl gives a 3D view, allowing the students to get the essence of the vivarium from all angles.


b) Prepare the ground by filling the bowl with dirt and rocks from the actual environment.


c) Do research and find out what kind of critters are natural and common to the area that you are capturing the essence of. If possible, collect a few critters to help create the essence of the environment.

(For Utah Valley, critters like the common grass spiders would be an excellent choice, as they are very abundant and not harmful to people.)

d) Materials can be gathered from some place that hasn’t been tampered with by humans. Another approach is to research the plants that are natural to an area and then collect samples of them for your vivarium.

Multicultural & Queer Theories Lesson Plan

Written By: Rachel Saunders and Allison Adams
Grade: Kindergarten
Time Needed: 3 25 minutes periods over 3 days  
Objective: Students will take pride in their own family culture and appreciate other family cultures. This will be demonstrated by a diorama that the students created using fine motor skills.

Social Studies Standards:
Standard 1(Culture): Students will recognize and describe how individuals and families are both similar and different.
Objective 1: Identify how individuals are similar and different. Button to show lessons.    
Indicator A.    Describe and compare characteristics of self and others (e.g., differences in gender, height, language, beliefs, and color of skin, eyes, hair).
Indicator B. Explain how people change over time

Kindergarten Visual Arts
Standard 1: Students will develop a sense of self.
Objective 2: Develop skills in gross and fine motor movement.
Indicator C: Perform a variety of fine motor skills (e.g., draw, cut, paste, mold, write).

National Art Standard

Procedure:

Materials Needed:
White Construction paper
Colored construction paper
stickers
glue
Mirrors
shoe box or other small box
crayons

Procedure:
Ask students the questions: Who are you? What do you like to do? What do you look like? Make list on board.

Boys and girls, this is how you correctly hold a pencil or a crayon:

Watch this video to help you teach them. http://www.youtube.com/watch?v=lM_dia8QGr
First write your name at the top of your paper. Teach students how to draw the basic body outline. Give every two students a mirror and have them look in the mirror to decide on the shapes and colors of their body. What shape is a head? a circle. It looks like this. Check your neighbor make sure your shapes both look like the circle on the board. Let’s draw it together. What shape is a nose? it kind of looks like a triangle. This is how you draw a triangle. Let’s draw it together. What color is your hair? Is your hair curly or straight? This is how we would draw curly hair, this is how we would draw straight hair. What color are your eyes. Could someone come show me on the board how you think we could draw an eye? What color is your skin?

Now that we have what our body looks like, let’s draw pictures of things you like to do. What shape is a soccer ball? A circle. Slide? Looks like a curvy rectangle.  Teach students how to draw the other basic shapes they come up with.

Have students share pictures of themselves with their table.

Tonight Boys and Girls, I want you to go home and give your parents this letter and ask your parents/guardian/whoever is at home these questions.

Example Letter:

Dear Parent/Guardian,

    In school we are learning about who we are, where we come from, and about families. Today in school, your child drew a self portrait with what they looked like and what they liked to do. Tomorrow, we would like to do the same for you. Please answer the questions below with your child. Please use simple pictures or words to describe the answers so that your child will remember the next day. Your child will also be asking these questions to a grandparent.

Thank you!

NAME:
Are you a boy or a girl?
What color eyes do you have?
What do you like to do?
What is important to you?
Where do you work?
What color hair do you have?
What color skin do you have?
What language do you speak?
How tall are you?
What did you like to do when you were my age?

(Next Day)

Okay boys and girls, now I want to go around and have each person tell me something about their family at home. (Go around the room)

Do we all have the same family? No, we all come from different families and the number of people in our families is different to and that is okay. We are all different.

Who remembers what we did yesterday? Review drawing techniques.

Boys and girls, now I want you to do the same thing that we did yesterday about you, but I want you do it for your parents/guardian/etc.

Walk around the room and help out students who need help thinking of ideas or reading their papers.

Once students have finished, bring them up to the front carpet. What did you learn about your parents? Do you think your parents were always the same? What do you think they might have been like when they were your age? Do you look like your parents? Do you like to do some of the same things your parents like to do? Do you think that you are at all like your grandparents?

Boys and girls, come to the carpet. I am going to read you a story about a little boy who was writing a letter to his grandma and she had kind of a hard time. While I a am reading, I want you to think in your mind how you can ask your grandparents some questions

Read Dear Juno. Write list on boards of ideas students come up with of how to ask grandparents questions. Ex: skype or video cam, over the phone, through the mail etc.

Boys and girls, now I want you to ask your grandparents the questions that I had you ask your parents, but I want you to think of two more questions about them that you want to know. Have your parents help you and bring your answers to class next week.

Next day

Repeat above procedure except assess student's fine motor skills in drawing the pictures and holding the crayon. Use the following checklist:

Use your thumb and pointer finger
Middle finger underneath
No red knuckles or fingers

Okay boys and girls now that you have finished drawing all of your pictures, we are going to cut them out. But first, you need to add a tab to each of your pictures so that it will be able to stand up.

Looks like this:


Once students have done this teach them how to use sissors: This is how you use sissors. Teach students by teaching the whole class first. Then going around to individual tables and demonstrating there.  Use this video as a guide: http://video.about.com/babyparenting/Using-Scissors.htm

Have students cut out some practice shapes first:


As students are working, have them individually assess their ability to use scissors. Using the following observe and assess your students:

Where are their fingers?

Were they able to cut out around the lines?

Did they use the scissors to just cut the paper?

Cut out three of the above shapes again?

Teach about Background, Middleground, and Foreground

Choose three students from the class and have them stand one behind the other from tallest to shortest. The farther apart they can stand, the better. Point out that the student standing in the back is the background (ex. a mountain, a faraway tree). The student in the middle is the middle ground, and the child standing in the front is the foreground. Point to each child in the row and have the class answer together "Background, foreground, or middle ground." Then discuss what elements of our landscape would be in the background, foreground, or middle ground. -http://voices.yahoo.com/kids-art-teaching-elements-landscape-222150...

Creating the Diorama:

Step 1: Get a Shoebox or another box you can use as a base. The box can be big or little
Step 2: Create the background. Who remembers what the background means? It means in the back. Boys and girls where do you think the background goes?  Point to the back of the shoebox. We are going to go the farthest back in our family. Who in your family is the oldest that we talked to? Your grandparents!

In the back of the diorama you can add colored paper and then put in the pictures you drew of your grandparents and  put what they like to do using pictures or stickers.

Step 3: Create the middle ground. Who remembers what middleground means? It means in the middle. Boys and girls what do you think we are going to put in the middle? Your parents.

In the middle of the diorama, add your parents and what they liked to do using hand drawn pictures or stickers. You can either hang the pictures from the top of the shoebox or glue them to the bottom.

Step 4: Created the foreground. Who remembers what the foreground is? It means in the front. Boys and girls what do you think we are going to put in the foreground? Pictures of you!
Have the students glue down pictures of themselves and what they like to do using hand drawn pictures or stickers.

Step 5: Have the students glue the cut out of their name and put it either hanging from the diorama or standing up at the top.

Step 6: Put any finishing touches to make the diorama about you and where you came from.

Step 7: Display and Discuss: Have students walk around the room and look at other dioramas. Then continue below:

Assessment

Have students get into groups of 4 and talk about what they learned about themselves, their parents, and their grandparents. How did your grandparents and parents change over time? Do you think they always looked like and were the same as they are today?  Have them also talk about what they learned about foreground, middleground, and background. They can use their dioramas to help.

Conclusion/Show Powerpoint We would then go into the power point about the multicultural and queer art theories that we showed in class. This would solidify to students how we all come from different places so we all see different things using the powerpoint and our dioramas as examples.
Norman Rockwell-America
 https://blogger.googleusercontent.com/img/b/R29vZ2xl/AVvXsEjXgWitIL0kt47UMYBYMjvj_ONIxEpaZO8x2qNU5dqymaNi0Z6BK3d552Noh8MS5DT28IUqBrHyul5SxVdEoONQkQSmWqfx7v5Fjy1on8fZArn0YqXRjVaCU628brTThiOE1UWg4zXHai8/s1600/Rockwell.jpg
 Asha Sudhaker Shenoy- India
http://images.fineartamerica.com/images-small/tender-love-asha-sudhaker-shenoy.jpg
http://fineartamerica.com/images-stretched-canvas/black/break/images-medium/mother-the-protector-forever-asha-sudhaker-shenoy.jpg
http://images.fineartamerica.com/images-medium/the-family-african-art-asha-sudhaker-shenoy.jpg
Jessie Meier- South Africa
http://images.fineartamerica.com/images-medium-large/african-family-2910-jessie-meier.jpg
China:
http://www.wikigallery.org/paintings/229001-229500/229284/painting1.jpg
Carmen Lomas Graza- Mexico
http://www.csupomona.edu/~plin/women2/images/garza_big.jpg

Feminist Theory Lesson Plan

Written by: Morgan Black and Danie Fairbanks
Grade: 5
Objective: Help students to understand the impact art can have on social movements and how social movements can lead to significant changes in the American Government.  Students will make connections between the women’s suffrage movement and the feminist arts movement of the 1970s culminating in an art project that deconstructs traditional notions of clothing and teaches a traditionally feminine skill in the context of art.
National Arts Standards:
Content Standard #1: Understanding and applying media, techniques, and processes
Content Standard #6: Making connections between visual arts and other disciplines
State Standards:
5th grade: Standard 3: Students will understand the rights and responsibilities guaranteed in the United States Constitution and Bill of Rights. Objective 2 :Assess how the US Constitution has been amended and interpreted over time, and the impact these amendments have had on the rights and responsibilities of citizens of the United States.
5th grade: Standard 5: Students will address the causes, consequences and implications of the emergence of the United States as a world power. Objective 2: Assess the impact of social and political movements in recent United States history.
1) Introduce the Women’s Suffrage movment, outlining the major events and motivations
  1. Define Suffrage
  2. Provide a brief history of the movement and its result (the process of amending the constitution will be discussed in the next lesson)
  3. Brief History:In the 1890s, women began pushing for the right to vote (Suffrage). A woman named, Millicent Fawcett founded the National Union of Women's Suffrage and encouraged peaceful, non-violent efforts to obtain women's rights.  It took a great deal of time to gather supporters and followers, and unfortunately men were not willing to give women any power. Emmeline Pankhurst became impatient and started her own group called The Women's Social and Political Union.  This group became known as the suffragettes.  They started out peacefully but grew more and more violent as they fought for the right to vote. Eventually, in 1914, when world war one hit, they turned all of their efforts to the war and helping their country.  The Representation of the People Act was passed shortly there after.n politics.  
  4. http://www.historylearningsite.co.uk/suffragettes.html
  5. Discuss other groups that had similar rights withheld
  6. Discuss groups who might still be struggling today
  7. Talk about what gender means today (Social mini lesson)
  1. How do we look at men and women differently?
  2. Did the suffrage movement lead to women being viewed differently?
  3. This movement resulted in a change in our country’s most important document: the constitution, but did it really change the way things are for women in other aspects?
  4. Do men ever find themselves struggling because of the way they are portrayed?
2) Integrate art into the lesson plan by showing how these women used art to further their movement towards social change
  1. in 1910, the National American Woman Suffrage Association distilled their best arguments into one-paragraph gems printed on postcards. Their “Think It Over” series proved to be not only an excellent consciousness-raiser but fundraiser as well, since NAWSA received a commission on each card sold.
  2. Images retrieved from: http://thesocietypages.org/socimages/2010/04/13/guest-post-how-suffragist-postcards-got-out-the-vote/
  3. Many artists of suffrage postcards remained anonymous therefore we have little information on the origin of each particular work
  4.  
  5.  
3) Discuss the process of Amending the Constitution so that students have an understanding of the governmental process behind the 19th Amendment.  
  1. Discuss the two ways the constitution can be amended
  1. 2/3 of both houses of Congress vote to propose and amendment
  2. 2/3 of the state legislatures ask Congress to call a national convention
  1. http://americanhistory.about.com/od/usconstitution/f/methodsamend.htm
  1. Help students understand why we have this process and why it is important
  1. How can we amend the constitution?
  2. Why was this important in the case of Women’s suffrage?
  3. Can you connect how the citizens were able to move the government officials to action? How can a non-government official help incite change?
  1. Define vocabulary:
  1. Amendment
  2. Ratification
  3. Convention
  4. House of Representatives
  5. Legislative branch
  6. Majority
  7. Propose
  8. Senate
  9. State Legislature
  1. 19th amendment:
  1. Passed by Congress June 4, 1919.
  2. Ratified August 18, 1920.
  3. Section 1: The right of citizens of the United States to vote shall not be denied or abridged by the United States or by any State on account of sex.
  4. Section 2: Congress shall have power to enforce this article by appropriate legislation.  
  5. http://law2.umkc.edu/faculty/projects/ftrials/conlaw/nineteentham.htm
  1. For more info on the social studies side of this see this Lesson plan on amending the constitution  
4) Help students further their knowledge of social movements by connecting the suffrage movement with the feminist arts movement
 Learn about 3 Major contemporary female artists
Jana Sterbak
Important Works
  1. Meat Dress
  1. The work also addresses issues concerning women, fashion, consumption, and the body. The equation of women with meat and the notion that “you are what you wear” are common ideas in Western society. In the United States, statistics have pointed to a growing number of young women with eating disorders such as bulimia and anorexia nervosa (referred to in the title), because their body types do not match the prevailing fashion or “look” sported by the tall, thin models populating the media.
  2. The dress was stitched together from 60 pounds of raw flank steak and must be constructed anew each time it is shown. Following a centuries-old method of food preservation, the meat is heavily salted and allowed to air-dry. Over the span of the exhibition, the aging process drastically changes the appearance of the work.
  1. Information and images retrieved from: http://collections.walkerart.org/item/enlarge_fs.html?type=object&id=957&image_num=1
  1. Remote Control 1
  1. Remote Control I is a large, motorized crinoline that the viewer or the wearer can operate via a remote control device. Reflecting the artist’s interest in control and technology, the work renders the wearer helpless, suspending her several inches above the floor.
  1. http://www.janasterbak.com/imagesofworks/remote-control-i/remote-control.jpg.php
  1. “I want you to feel the way I do”
  1. Information and images retrieved from http://www.learn.columbia.edu/courses/fa/htm/fa_ck_sterbak_1.htm
  1. The work, as initially acquired by the National Gallery of Canada, is a dress made of wire mesh, displayed in a darkened room. When a viewer enters the room, a motion detector activates the slide projection of a text on the wall behind the dress, and also activates a heating element in the dress,causing it to glow. The text reads as follows:
  1. I want you to feel the way I do. There’s barbed wire wrapped all around my head and my skin grates on my flesh from the inside. How can you be so comfortable only 5” to the left of me? I don’t want to hear myself think, feel myself move. It’s not that I want to be numb, I want to slip under your skin: I will listen for the sound you hear, feed on your thought, wear your clothes. Now I have your attitude and you’re not comfortable anymore. Making them yours you relieved me of my opinions, habits, impulses. I should be grateful but instead … you’re beginning to irritate me: I am not going to live with myself inside your body, and I would rather practice being new on someone else.
Sharon Kallis
Important Works
  1. Barraca de Vinya
  2.  
  1. Coil basketry techniques taught to various community members using invasive Vitalba (wild clematis) as binding twine, with local fennel, rosemary, and verbena.                 
  2. CACIS Residency (Centre for Contemporary Art and Dialogue in Sustainability), Calders, Spain.
  3. Barraca de vinya is the Catalan name for the rock dry-stack tool huts that stud the landscape in Catalunya as evidence of the land’s past ties to wine production - the sheds were built with rocks from clearing the land and stored farmers tools.
  4. Information and picture retrieved from: http://brandford-elliott-award.com/BEA_SharonKallis.html 
  1. The Ivy Boat
  1. Sharon Kallis, The Ivy Boat, 2009, English ivy, assorted park maintenance branch waste. Collaborative project in a Vancouver park; a total of 200 volunteers over four days participated in pulling ivy, building a structure, and weaving the ivy boat.
  2. Sharon Kallis’ Ivy Project at Stanley Park. The park was being over-run by English ivy, so volunteers from the Stanley Park Ecology Society removed almost five hectares of invasive material. Under Kallas’ direction, the vines were dried and then netted, crocheted, or spool knitted into "nurse logs" and "bio netting" to hold eroding soil in place long enough for new native growth to return. As these elements gradually decay and allow for a succession of growth, the environment will become a collaborator as well, bringing the cycle full circle.
  3. Information and image retrieved from: http://brandford-elliott-award.com/BEA_SharonKallis.html
Ann Hamilton
Major Works: Most of Ann Hamilton’s artwork is installation based but she has several beautiful objects as well.  Watch the following video to get a feel for her artwork and share at least minutes 0:20 - 1:30 and 6:24 - 6:44 with the class.
  1. Object art: carriage
  2.  
  3. Slices of paperback books, cheese cloth, string, bookbinders glue, binders board, museum board, bookbinding cloth, acrylic panels
  4. Edition of 15 with 3 Artist's Proofs (#14 pictured above; #10 below)
  5. Outside circumference 13 3/4 inches, inside circumference 5 1/2 inches, depth 2 1/2 inches 16 3/4 inches length if laid straight)
  6. Box dimensions: 18 7/8 inches square, 4 1/2 inches high
  7. Archival box produced by Culpeck & Clark Limited, Rhinebeck, New York
  8. "The circle of the hand making is the first eye. It is the empty center in the tower, the clearing in the forest, where with the fundaments of cloth and paper and line we weave and re-weave unending relations." — Ann Hamilton
  9. Information and image retrieved from: http://www.annhamiltonstudio.com/objects/carriage.html 
5) Help students connect the modern feminist arts movement to the suffragette movement of the late 1800’s and early 1900’s by discussing similarities and differences.
  1. What connections can you see between this arts movement and the suffrage movement over 40 years before?
  1. How does this art send a message the way the postcards did? Is it different? How?
  1. What are your thoughts on feminism? Is it time for women to have the power over men, or should we be seeking for equality? Why is this your opinion?
  1. Turn students’ attention to the art aspect of each movement specifically- why were postcards so useful then but now we use so many other forms to express similar ideas?
6) Introduce the art project and discuss the importance of media and process in art in conjunction with the last question.
  1. Why is it important that we use torn up clothing rather than regular fabric from a fabric store?
  2. Does that change the meaning behind the artwork we have created? If so, why?
  3. Could you use another type of media to share the same message? If so, how?
Finger Weaving Art Project
As students choose their colors and decide how thick or thin to make their bracelet each artwork will be individualized.  
Although jewelry is traditionally feminine, the freedom to choose the texture and color of the fabric and the generally ambiguous form of the finished product produce a sense of equality.  We aren't trying to break down men in order to build up women, but rather break down societal limitations to find equality.
 
Once each student has created their piece they can reflect on how the media they used changes the meaning of the artwork. Ask:
  1. How can something like weaving be considered art just like a painting? Think about what each artist did with their "domestic" talent.
  2. Why is it significant to you that you used an old T shirt rather than fabric from the store? Did that T shirt have meaning for you at one time?
  3. How does this project connect with what we learned from the suffragettes? The feminist art movement?
7) Assessment: Students create another artwork to reflect the struggles of another social movement on their own.  
  1. The teacher can provide a list of appropriate movements to research for their age group and give students time to search the internet and check out books at the library.
  2. The student can then present their movement in class and describe the role art played in it as well as the meaning behind their own personal artwork.